CS40: Assignment #6: 3-D Viewing Pipeline Paul Azunre, David Wright
|
|||||||||||||||||||||||||||||
Description In this lab, a 3D transformation library was written and then used to build a 3D view transformation function. This function enables the perspective drawing of 3D objects. The function was tested by drawing the perspective view of a cube. This Lab exercise was generally an extension of the work done The 3D Transformation Library The transformation functions added to the library follow Professor Maxwell's specifications. In addition to the required functions, a function was written to perform a cross product between two vectors. This function is described in detail in the API Additions section at the end of this writeup. All transformation functions were relatively easy to implement as they were simply an extension of our previously written 2D transformation functions. 3-D Perspective Viewing PipelineOnce the 3D transfomation library was functioning, the 3D perspective viewing pipeline was implemented. The underlying principle of the perspective view process is that the view reference axes need to be aligned with the world coordinate axes and scaled appropriately. To do this, the view reference axes need to be first made orthonormal (perpendicular to each other), which involves computing a couple of cross products of VUP (view plane UP direction) and VPN (direction in which the viewer is looking). The View Reference Point (VRP) needs to be then translated to the origin and the orthonormal axes aligned with the world coordinate axes. After this, the Center Of Projection (COP) can be moved to the origin by simply translating by a distance d in the Z direction. Scaling parts of the world that need to be visible [as the defined by the back clip plane (B) and the View Window Extent (du and dv)] to the Canonical View Volume (CVV), projecting them onto the image plane and scaling to the specified image size completes the process. This procedure is defined as a sequence of 3D transformations on the assignment page. The initial run of our viewing pipeline resulted in the animation shown in Figure 1. It is easy to notice aliasing issues in this animation. As a result, we could ignore aliasing no more and implement some anti-aliasing techniques (resisting the system is futile). Anti-aliasing was done by combining post-filtering and supersampling techniques. A function was written to apply a Gaussian filter of specified radius to an image. This function is described in more detail in the following section. Images were rendered at a resolution of 400x400, and then downsampled to the required size of 100x100. The results are much smoother and pleasing to the eye. These are shown in Figure 2.
Figure 1. Initial output of the perspective function (Quicktime Movie) The crazy motion of the camera (as defined by VRP) in Figure 1 was due to a bug in the function Matrix_xformPoint that was later fixed. The effect of the bug is however pretty cool which is why the image is presented as is. All hail serendipity. --------------2a ---------------------------------2b---------------------------------2c--------------
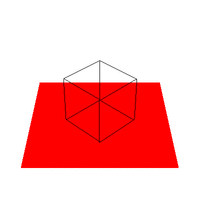
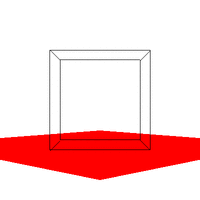
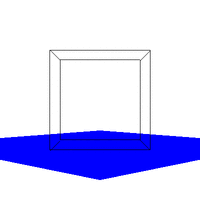
Figure 2. Required Images as .gif animations The first animation (2a) in Figure 2 is formed by expanding on the first required image. The VRP is made to rotate around the Y direction of the center of the cube, starting at the required point of [0.5,0.5,-2]. The second animation (2b) expands on the second required image by starting VRP at [4,4,-3] and again rotating it around the center of the cube. Three sides of the cube are visible at any point in time, as required. The third animation (2c) shows the box (viewed from the same perspective as in 2b) sitting on a red surface. 2c gives some reference to the rotation of the cube. But really, it was implemented just because we thought that it would look cool. And it does. Implementing a Gaussian Filter The Gaussian function, popularly known as the normal distribution, is a an ubiquitous filter in the field of computer graphics. It is very useful due to its desirable qualities of being smooth and circularly symmetric. The function can be expressed symbolically as:
where r is referred to as the radius of the function. Application of this 1D filter to a 2D image requires converting it into a 2D form by its property of being separable. This property implies that the value of the filter at a 2D location, (x,y), can be represented as the product values of the filter at locations x and y, i.e. F(x,y) = F(x)*F(y). After forming a 2D array of filter values corresponding to each pixel in an image, the filter array can be convolved with the image array to yield an improved image. Implementing a Box Filter Implementation of the box filter was very similar to that of the Gaussian filter. The Box filter functions just to average a specified number pixels around every pixel. Thus, the only difference between the Gaussian and Box filters lies in the weights assigned to the color values of surrounding pixels. The Gaussian filter assigns weights based on the normal distribution while the Box filter assigns equal weights to all pixels. The constant weight assigned by the box filter to each pixel may be expressed as 1/(2*r+1), where r is the specified distance from the main pixel to each of the edges of the box that includes pixels to be averaged ( which means that the total number of pixels to be averaged is 2*r +1). Comparing the performance of the filters The picture of a ninja cat was subjected to 10 succesive treatments of each filter specified by r = 2. The two resulting animations are presented in Figures E1 and E2. It is clear from these images that the blur produced by the Box filter is more pronounced than that of the Gaussian filter. This makes sense because in the Gaussian filter, the center pixel is weighed the most, while in the Box filter, it is weighed the same as all other pixels.
Figure E1. Ninja cat subjected to ten successive iterations of a Box filter defined by r =2.
Figure E2. Ninja cat subjected to ten successive iterations of a Gaussian filter defined by r =2. It is important to notice the dark borders formed in Figures E1 and E2 as the filtering process progresses. This happens because in order to perform the convolution, r pixels at each edge need to be dropped in oder not to run into unallocated space. While more sophisticated methods exist for dealing with this problem, they were not implemented at this time. Also, since only filters of relatively small r ( 1<= r <= 4) are required in practise to achieve desirable anti-aliasing effects, this effect is not pronounced in our applications. Just for the heck of it, the border clipping effect described above was used to create an interesting animation, shown in Figure E3. Why not?
Figure E3. "Border clipping" effect used to create an interesting (or more likely, annoying) animation. API Additions The following functions were written in addition to the required functions as specified in the assignment specifications:
Questions
 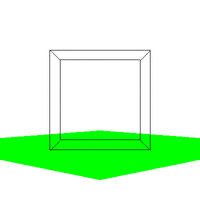  Figure 4. The effect of varying VUP.
|
|||||||||||||||||||||||||||||
© Paul Azunre, David Wright, 2006 |